Sunday, September 28, 2014

Quality Landscaping Supplies Affordable

Ever wanted to shop in the comfort of your own home for all your gardening and landscaping needs? Then look no further. At  Landscaping Supply Co, we have a great selection  of organic mulches, potting soils, worm castings, root insulator sawdust, landscaping pea gravel and more. When you go online to buy your trees, shrubs, perennials, ferns and live mosses don't forget to buy your necessary items to plant and landscape your new design with. All at a one stop shop.

Click Here To See Our Variety - Shipped To Your Door!


Thursday, September 18, 2014

Successful Composting

Research composting if you are contemplating using this natural mulch and fertilizer in your organic vegetable garden. A couple of things can be used to reach a result, the hot method and the cold method. If you are using the hot method, you could have matured humus that is ready to use in a few weeks. Using the cold method takes much longer and will most likely not be ready to use for about a year. Use basic things now to avoid problems later. First you need to locate an area away from your living space for your compost bin. It is also wise to construct this container on level ground. Once you have your container completed, you can begin adding materials. A good base of grass cuttings, small twigs, chopped up leaves or straw. It is called your base layer. All the mixture in the compost bin has been chopped up into small pieces, usually about the size of your thumb. Begin adding your other ingredients such as kitchen scraps or manure.


Always remember to add a layer of grass cuttings, leaves and such (brown food) over the top of the kitchen scraps (green or nitrogen rich food). You will want to have about twice as much brown food in your compost bin as green food. At this point, depending on how much humus you may need, you may want to go ahead and construct another bin to fill up while the first one is maturing. One will never run out of humus for your organic garden. When the first container if full begins filling the second bin. Turn the materials every day or so in order to get fresh air to all the ingredients and also to help control odors.  When the bin is full, add a layer of brown food to the top. Heat the mixture wants to leave your humus to cure or mature.Remember to stir or turn the humus every couple of days. It is also necessary to sift your humus before using it on your garden to make sure that any large pieces are removed.

The better perennials

Perennials are by far the best type of flower and plant to place in your garden or landscape area. They will save you money each year instead of having to buy new flowers each season.  Additionally, most of them are easy to care for and maintain.  Here are some great choices for perennials that you should consider adding to your garden or landscape.  The Blanket Flower is a great choice.  It is very heat tolerant and drought resistant and will give you color for the entire spring through the summer. They will bloom in reds and golds with three inch blooms that are similarly looking to that of a daisy.  Garden Phlox is another great choice.  It is a wonderful bordering plant and can grow up to four feet tall. The flowers this plant produces are fragrant and will bloom from the summer months of the year all the way into the fall.  It is also great to act as a ground cover in some areas.  Russian Sage is also great.  It is a larger perennial that is perfect for larger landscapes.  It will be about five feet tall and about three feet wide and will produce beautiful blue blooms during the summer months of the year.  They love lots of sunlight and are very tolerant of heat.  They are also drought resistant and will be breathtaking in your landscape.  Peonies are also beautiful choices.  They produce very fragrant and lovely blooms during spring through the fall.


They can grow anywhere from two to four feet and grow in clusters to form a shrub-like appearance.  Irises are another great choice.  They have a shorter blooming period but will take your breath away. They grow in any color one could imagine and will multiply each year when they return.  Daylilies are also beautiful and even though their blooms only last one day, they bloom all spring and summer long.  They are also low maintenance and can grow in a variety of conditions.  Try one of these perennials in your garden today!

Choosing a garden

If you are new to gardening or landscaping, you might feel overwhelmed with the many options that are available.  Every garden and gardener needs a plan.  You want to start with what type of garden you want. There are several types of gardens that you can put in your yard.  If you want something that just looks pretty in your yard, try a flower garden.  You can fill this area with a multitude of plants that grow each year. They will also provide lots of colors and most are hardy and versatile.  Most of these will also make delightful and beautiful fresh cuttings that you can turn into arrangements for your home.  Research that perennials are best for your climate area.  You can also plant a vegetable garden.  These will just as beautiful as most of them produce flowers before they bear their vegetables.  They will also give you something delicious that you can cook with or eat raw.  This is also a great type of garden for the whole family to get involved.
Some gardens take more effort, but it will be worth it!  You can even have some of these plants indoors to give you year round fresh vegetables! A harder garden would be to try a fruit garden.  These are fairly high maintenance and pests, and other animals are often drawn to the area. The soil needs to be adjusted, and they are fertilized at the right times to ensure proper growth and development. The work will be all worthwhile once you are enjoying fresh fruits! Every garden need to have a plan and make sure your schedule allows the right amount of time to fully care for and maintain the area.  If you cannot just pick one, do not worry as you can have multiple types of gardens in your landscape area!

Wednesday, September 17, 2014

Bonsai Care tips

Bonsai trees are wonderful plants you could add to your indoors.  It is long lasting, and each one will have its unique shape and style.  Here are some tips on caring for this plant inside your home to make sure it grows and develops properly. Before just placing it, any old place ponders on where you want to put it. These trees need lots of sunlight, so placing near a window will be the best choice. They do not grow well in sun all day long as too much is a bad thing for these indoor wonders.  Temperature is also something to consider.  They should not be placed near things such as televisions or heaters and love cooler temperatures.  Place where there is cooler air as heat will dry the plant out quickly, and it will not survive.  Humidity is also a factor.  These trees love moisture!


Some experts even recommend placing them in your kitchens or bathrooms due to the level of moisture in the air in these rooms.  They also believe that keeping the plant on a drip tray will allow for prolonged evaporation that will be better overall for the tree.  Misting the tree is also a great way to increase moisture levels.  Even though you want this to be an indoor plant, you will also want to think about letting it get some outdoor love as it will benefit drastically from the warm summer months and the contact with nature.  Many ask a lot about how water this kind of tree.  Since they are kept in pots to control the root system, they will require extra watering.   If the climate is warmer, the bonsai will also need additional water to thrive. Check the plant by touching the top of the soil in the pot.  If it feels dry, water needs to be added.  Bonsai trees are beautiful, low maintenance and will make an impact on any home.

Tuesday, September 16, 2014

Wild Rose Care

Wild roses are beautiful and slightly different from more domesticated varieties.  When you are thinking of growing these in your garden, you need to know a few things about where they grow naturally as well as how to care for them.  Most of them are single bloomers and will not vary too much in their coloration.  Most are pink, red, white, and some are even yellow.  These kinds of roses are hardy and versatile since they are supported on their root systems that have had no interference from man whatsoever.  They will also make it through harsh winters and return even more beautiful than before the next spring. They are easy growers and planted just like any other flower or plant you have in your garden area.

They need lots of sunlight and moist soil conditions. Space them properly because overcrowding can stunt their growth or even kill them over time.  Overcrowding also increases chances for disease and pests.  After planting, make sure they get lots of water and a little extra attention.  However, after these plants’ root systems have become established in their new home, they will need very little from you as a gardener. Little maintenance is involved such as removing deadheads and trimming the branches. Removing old blooms and unsightly parts of the plant will promote and encourage new growth and will make the plant over healthier and happier in the process.  These are beautiful for lining driveways or walkways, or you can even make this a show piece in your garden to impress your friends and family who come to visit.  Just make sure you when buy these that you have the time in the beginning to get these established in your garden so that they last for years and are beautiful.  Also, read up and research the particular variety you are choosing to plant in your garden and soil conditions.  Enjoy your wild roses!

Christmas trees

Christmas is the most loved time the entire year, and most people start shopping, planning and counting down months before it even arrives.  Christmas! Everyone seems to get along, and everything feels right.  Many people have a tradition of going and cutting down their very own real tree to put in their homes and decorate.  The most popular types that are bought for home decoration are white pines, scotch pines, balsam firs and Douglas firs. A few things to remember is these so they will last you all season long.  When you are buying your tree, you want to make sure you either go out and cut your own or visit a tree farm with a good reputation.

When you visit the nursery or area where you will be cutting, check the area for needles on the ground.  If there are many of these, it may signal that the trees are not healthy, and you should take your shopping elsewhere.  There is a simple way to see how fresh a tree may be.  Take your hand a lightly grab a branch and pull towards yourself.  When you do this, the needles should not falloff.  When you get your beauty home, you want to take care of it.  Most recommend cutting a few inches off the bottom before you put it in water as it absorbs water better and will last longer. They need lots of water.  When a tree is first cut, they can take in a gallon of water in a single day.  You should never let the water level get too low, so check on this daily.  Also remember that the temperature in your home will affect how well the tree does.  They love cooler temperatures so the lower you can go, the better for the tree. Christmas is special for most families, so make sure to get the best tree you possibly can.

Monday, September 15, 2014

Do organic gardens at home

Just imagine growing your own fresh, natural, better tasting vegetables own your own in your back yard. What an amazing way to eat! If you can plant a plant and water it, you can succeed in your organic vegetable garden. It is that simple. And the benefits for your health and the health of your family are worth the commitment. First you will need to determine where in your back yard is a good place for your garden. Your garden needs about six hours per day of sunlight, and you will need a place with good drainage and rich soil. Do some work for your garden area to enrich and fertilize the soil. It can be done naturally using mulch and compost. You can purchase compost at your local lawn and garden store or, if you want to be sure that you have natural compost, you can start your compile pile, bin or barrel.

Simply add food scraps, grass clippings, leaves, coffee grounds, etc. Remember to locate this bin or barrel away from your home and stir it all up a couple of times a week. It will smell a bit unpleasant, especially if it is warm in your area. Add this material to your soil, mix it all it, add some peat moss and maybe some earthworms and your area will be ready for your to plant your vegetables. You will need to research and get some advice as to which vegetables will do well in your area. Your local nursery or gardening store can give you excellent advice in this area. Pests and disease will be another concern for you as your garden begins to grow. Get rid your garden of pests or prevent them to begin. Natural predators such as lizards, birds, frogs and even other insects are great to add to your garden. These will control your pests in a natural way. Most diseases can be handled with warm water and mild dish detergent. You will also want to add some fencing if you live in a rural area where wildlife might enjoy your garden before you do. It is a simple process. You will need to plan some and learn and enjoy the benefits of eating healthier.
 

Farmers are starting to go organic

People are becoming more and more informed about what they ingest. They are researching healthier ways of eating and growing their food. And many more of them are buying organic vegetables. In years so many have now started growing their vegetables organically. Probably the most beneficial to the gardener is that there are no harsh chemical pesticides or fertilizers to worry about feeding to your families. All organic vegetables are grown using only natural things, and no chemicals. Therefore, people who eat organic foods are eating less processed foods and have less chance of ingesting any of the toxins used in conventional gardening. And organic vegetables have been proven to contain more nutrients, vitamins and minerals that those grown conventionally. However, there are even more benefits from organic vegetable gardening. It is environmentally-friendly. When harsh chemicals are used in conventional gardens. Through organic gardening, the soil and the environment are preserved. By using a method called crop rotation, which is simply not planting the same crop in the same spot each season, but rather rotating things around, the soil is not left harmed or drained from nutrients.


Therefore, the soil is good to use for future generations to come. Fertilizers and even pesticides are all natural. Pesticides such as frogs, lizards, birds and even other insects are just as effective in preventing pests as the toxic pesticides used in conventional methods of gardening. Fertilizers consist of manure and composted materials, which are all natural, therefore, not harmful to the environment or the people who are eating the produce. This method of gardening is not difficult. It is easier than one could imagine. The main things you need are sunlight, water and soil. Most homeowners have all of these in their back yards. Although organic vegetable gardening can take more planning and commitment than conventional gardening, it well work the extra trouble to invest. Not only does it feel good to grow one's food, but it is so much healthier for you and your families. You will all be much healthier for investing in this new project.

Preventing Weeds

Weeding our garden and landscape areas can be quite time consuming and is not a favorite maintenance item on any gardener’s to do list. Several things to help keep weeds out and to make your garden or landscape area look healthier. In every square inch of your garden, there are hundreds of weed seeds.  However, not all of them will sprout as some are too far down in the soil to get any sunlight that is required this pests to grow and flourish.  So a great way to prevent more weeds from coming in is to not disturb the soil in your garden unless you need to.  


If you need to remove weeds, wait until the soil is moist and kill them at the root. It will keep the seeds lying in the soil never to bother anyone!  Mulching is also another way to keep these weeds at bay.  It will starve the weed seeds of sunlight which they need in order to grow. It keeps the soil moist which plants and flowers love and will  encourage growth and productivity.  If you do not like mulch you can also use other things such as wood chips, bark nuggets and pine needles to get the look and benefits that you want in your garden area.  You also want to weed areas if needed after a rain. The soils roots of the weeds will come out with little effort. Destroy weeds at the root to remove that one fully from the area without fear of it coming back over and again.  If weeds are larger you will have to lop off the head of the plant that will also keep it from spreading its seeds over your landscape.  Whatever method you use to keep weeds out your garden area, just make sure to be smart and efficient in the removal and prevention of this time consuming plants.

Rose Gardens


Making an area in your garden that is completely devoted to the beauty and splendor of roses is a great idea and will give a very sophisticated feel to that particular area.  These flowers have been and will remain popular among homeowners and gardeners simply because of their classic look.  Just like other flowers with many cultivars, there are hardy rose bushes and not so versatile ones. This type of garden will require more preparation than others and also will need more care and maintenance to encourage these beauties to reach their potentials. Make a beautiful rose garden right in your backyard.  When choosing a location, make sure to pick one that gets anywhere from four to seven hours of sun if the soil has good draining qualities. The pH needs to be slightly acidic of anywhere from 6.2 to 6.8, but roses will also do just fine with pH readings of up to 7.5.  Preparation also helps and in the fall months of the year, and this is a prime time to mix in fertilizer the following spring.  Anything like grass clippings, leaves and coffee grounds will have a wonderful effect of adding much-needed nutrients.


When planting the roses, make sure to loosen the ground so its an easier time of adjusting and branching out in their new homes.  When planting, make sure to about two to three inches of mulch to help keep water in the soil, weeds away and give the area an overall finished look.  Adding compost regularly is also recommended by experts to keep the entire area healthy and full of nutrients.  Follow these tips to a healthier and happier rose garden and enjoy the fruits of your labor each spring!

Sunday, September 14, 2014

Types of Bird feeders

Birds are a unique, versatile creatures.  They make lovely music with their chirping and make our garden and landscape areas look alive with all of their humming and buzzing about.  With that in mind, we need to make sure that we put bird's feeders in our gardens to help them with food sources as the constant build up of areas has this limited in some places.  There are several kinds of bird's feeders you can enjoy in your garden.  Here are a few types to try out.  Tray and platform feeders are quite popular.  They attract a wider range of species including sparrows, pigeons and even finches. These kinds are that they do not keep the elements such as snow and rain out.  Once seeds become so wet, they can start to sprout, and birds have no use for this.  As moisture builds, they may also start growing fungus that will deter birds from feeding here.
If you choose to use, this kind makes sure to have a screen on the bottom so water, and other elements can drain out and make sure to empty and clean it at least once a week.  House feeders are another popular choice.  They keep the seeds dry and protected and will attract multitudes of different kinds of birds including finches, grosbeaks, cardinals, chickadees and sparrows.  What a variety!  If you have a smaller landscape, try a window feeder.  These attach to your glass using suction cups, and they have hooks that attach to the frames as well.  They bring finches, chickadees and many other birds to the area.  They also give you a personal and up close look at the beautiful wildlife in your area that will be something very wonderful to behold.  Tube feeders are also a great choice.  They keep the seeds dry and can keep most squirrels away from the area.  You will love watching the birds move around this tube and feed as it is quite interesting to watch.  Try one of these birds feeders in your garden soon and bring the wildlife to you.

Saturday, September 13, 2014

Landscaping with bridges

Deciding to add a focal point such as a small bridge in your backyard garden is a great move and will pay off with the many ways that you can use it in decor as well as all of the many varying compliments you will receive from this beautiful addition.  In a Japanese garden, bridges take on quite a different meaning and effect.  These will look simply gorgeous over a pond, a small river or any other small body of water in your landscape.  They will create a tranquil and peaceful environment,  giving you the zen you are looking for.  Gardens are supposed to give us a calming feeling and be somewhere we can relax.  For some reason, bridges seem to do that quite well.  These also look nice over a rocky or stony area and will give you much needed life where it is otherwise hard to grow plants and flowers.  When first looking at designs for Japanese bridges, you may be overwhelmed.  There is so many different types of bridges to choose possibly from, and each type has its own different things it will bring to your garden.  Once you have fully decided on the design you want and placement of your bridge, you will also need to think about whether to leave it as it is or accent it with various plants and flowers.  Here are a few in some categories that will do just that! Evergreens are essential with this type of garden or bridge.  They represent the permanence of peace and calming.  Some evergreens that are great for this are cedars.  Cedars will also add a lovely scent to the area.  Also, Canadian Hemlocks and redwoods are perfect!  With their dark green foliage, you can have a brightly colored bridge that will really stand out!  Pine trees are also great for this type of design.  You can also add flowers such as Japanese Irises, peonies, azaleas and Japanese Maples to the area to  complete and bring together the zen look you are trying to achieve.  All of these flowers and trees are whimsical in their appearance and will look beautiful much of the year!  Try out a Japanese garden bridge and get creative with you garden area!

Thursday, September 11, 2014

Removing old trees

Sometimes you may have to face the stressful task of taking out a tree that you have had around for many, many years. Reasons for tree removal are many, the tree gets too close to buildings, or maybe gets a terrible pest infestation or disease, making the tree weaker and more likely to fall, or maybe the tree is just too old and weakened to leave it standing. There are cases when power companies will come in butcher a tree because the power lines are going through it. Whatever your reason, when it comes time to take down a tree that has been growing for many years, it can be a sad time, but it’s best to take the tree down rather than let it fall on your home or your neighbor’s.

The main thing that most gardeners, nurseries and landscapers will recommend is that you hire a professional to take the tree down if it is an extremely large tree. If it is a medium size tree that is not close to anything like fencing or buildings or other trees, you are probably safe to take it down yourself. But make sure that you plan it out before you start to cut. Plan on which direction you need a tree to fall in, measure so that you are sure the tree will clear any obstacles and then you can plan on taking down the tree. You will need to get together all the tools that you need, such as a chainsaw, ropes, rakes, gloves and above all, make sure you use protective eyewear. Flying wood chips can do serious damage to your eye or even cause loss of sight. Once you have everything assembled, along with a few good friends to hold the ropes, you can start to cut. You will need to cut a sideways “V” into the trunk to be sure that the tree falls just as you have planned it to. Don’t cut a straight line into the tree, this can cause the tree to roll to either side and make in more uncontrollable. If your friends are holding the ropes and the cutting process goes as it should, the entire process of taking down the tree should be very uneventful. The trunk, however, presents another problem altogether. The recommendations are to use a tree removal company to handle the stump.

Tuesday, September 9, 2014

Organic Gardening

A new gardener needs to not have some experience.  All of probably planted our little seed at some point in elementary school and watched it grow.  Gardening is all about trial and error. Some things work and do not, so you have to readjust what methods you use.  Here are some simple and effective ways to introduce yourself to organic gardening and all of the benefits that come with it.  To start, you will need to make your bed. It needs to be done about three weeks before planting begins.  You will need to loosen the soil about a foot down into the ground and rake the surface until all the weeds, clumps and other debris are gone.  Until planting time arrives, make sure to keep the area weed and debris free.  Doing this weeks before planting makes sure that weed seeds that were deep in the ground and sprouted will be removed before planting begins.  Also digging shallow furrows or holes for planting your seeds is the best way to go, and you can design your garden however you want it to look.  Also watering at just the right amounts is important. Soils need to be kept moist, but not soaked. Watering the soil before planting is the best way to go because the seeds will not be soaked or wash out of the soil. Allow for room to grow when planting seeds and properly spaced. Follow instructions on the packets that were purchased.  You can also put two or three seeds in each hole for better and fuller results.  Also, when planting the seeds, realize that they need shallow ground and not deep. Just barely covering them with soil will be sufficient, and they will flourish and thrive and exceed your expectations.  Keeping the soil and seeds moist is key, but note they only need to be watered as the ground is dry needs extra care until all the seeds are sprouted.  Just remember that organic gardening might seem like a lot, but not too much for anyone!


Monday, September 8, 2014

Why use landscaping stones?

A homeowner or gardener would like to use landscaping stones when creating a special place on the lawn or designing a beautiful garden or another area. Landscaping stones are great to use when try to stop soil erosion, and they are also great to create a wonderful art that will drain unwanted water very well. Placing landscaping stones in certain areas can remove unwanted water buildup and will cause the water to drain in other directions. It will help a lot with that terrible problem of soil erosion, especially on sloped banks and lawns. Also, it will allow water to drain out of the garden instead of standing in certain areas around the garden or natural area. They will also provide a beautiful natural look when placed around the garden or another area as a beautiful border. These stones also come in a lot of colors, and there is one that will go with all homes and properties. Gorgeous landscaping stones can give the lawn a splendid look as they are used for landscaping projects and ideas. The larger size will look great when added to natural areas or gardens to decorate the inside of the garden. A large landscaping stone with beautiful flowers growing around it will be beautiful during the spring and summer months of the year. These landscaping stones will also look great when used to add a wonderful border around a sidewalk, driveway and water garden. They will also give a great look when used to outline a swimming pool area or a lovely patio or deck area. Landscaping stones will also survive those harsh winter months of the year and will not have to be replaced in the coming spring and summer months. These hardy stones will last for years and are great on a budget. Go ahead and design that lovely lawn or garden that you have been dreaming of and get ready for the winter months of the year.

Tuesday, September 2, 2014

Best Plants for Border Areas

BORING BORDERS? Borders in a garden, do not have to be boring, Plant Shrubs! There are many ways to add decorative touches, without using flowers. Most of them require little to no maintenance at all.

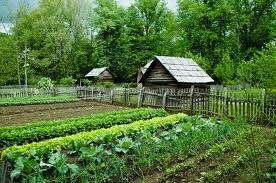
In my garden I have three types of borders employed. The most simplest of these is 'banked' borders. These are borders that have something substantial being used to contain the area worked in. Banked borders come in four specific types. 1 – Stones, masonry, walling or cement, bricks. 2 – Wooden. Whether that is an actual trunk of a tree laid down, or a wooden fencing it self, or just garden posts of wood. Hedging/trees inclusive. 3 – Metalic. Standard chain-link fencing and gating. Circular cages. 4 – Tubbing borders. These are usually container gardens in themselves, used for the purpose of giving a different height and perspective to the plants and shrubs.

Personally I use stones, and circular cages made of chicken wire. Occasionally employing the odd wood and tree limb. Depending on what effect I am trying to achieve in my garden. Here's some ideal tips and advice, for making your borders more attractive and easier on the maintenance level.

Stones & Slab Borders

You can buy stones in all shapes and colors and also all sizes. There are a variety of ways to stop stones looking dull and boring. Especially if you are like me, and only have one type available to use. When lining say, a flower bed, with stones, try using larger flatter pieces, on their sides. You can paint these, if you are feeling adventurous. Build your stones thicker as a border, and place a few species of rock growing plants on the top spread down. Creating a beautiful carpet of color. Chose something simple like a phlox or a succulent used to arid rocky areas. The plant called 'chicks-n-hens' is good. Cemented slabs, formatted stone (tiled or specifically patterned) add their own uniqueness to a garden border. Try paving your border. Placing slabs at varying intervals between plants.

Wooden Borders. Use an old tree trunk. Trim off excess branches. Cut or delve a deep groove along its center, and plant pansies or similar annuals and perennials. Even new saplings planted inside all cut trunks. Of course you could paint them too. Or you could just waterproof stain them. Add planter hangers as an extra decorative touch to your wood fences, then add wind chimes.

Tubbing & Metallic Borders. Sadly not much you can do about chain-link fences. Unless you plant a climbing plant that is hardy and fast growing. Like ivies.

Tubbing is pretty self explanatory. I use this method, as it helps add depth, perspective and extra color to the garden.

Easier to remove the tubs, when mowing. Planters come in a variety of shapes/sizes. Don't be afraid to experiment!

Pointer: If painting a border. Do it before you plant. Ensure its non-toxic all weather paint. So that it lasts, and doesn't kill your garden.

Buy shrubs online at Garden Delights Nursery

Transplanting Seeds & Others


 Seeds First!
So, your seedlings have sprouted! Congratulations, now if you did not use the outdoor method you need to transplant them into the soil. Hope you remembered to keep your seed's original packets! You are going to need them!
Most seeds, are usually evenly spaced. Between 3 – 6 inches depending on what you are growing.
Make sure your furrows, or rows, are evenly spaced too, with a slightly deeper channel between row spacing, this allows for good drainage and good watering. Plus, gives you space to walk down if it becomes necessary to thin them out some more.
Cover lightly with soil, up the stem, (depending on height of plant) about an inch.
If you are going to add some form of plant food, add it to your water! NOT directly to the soil!
Remember if you used the outdoor method, you only need to thin the seeds out a bit. Not a lot. Most seeds grown outside are more healthier and stronger than those grown indoors or by the cheats method.


Big Plants, Shrubs & Saplings!
Water your 'others' if they are in pots. Just give them enough to make the soil in the pots damp.
Wait 10 minutes.
Then carefully, pick up the pot. Placing a hand around the main stem frame of the plant or shrub.
Turn it upside down, do not crush the leaves or new growth.
Give the pot a few solid taps on the bottom. The plant should slide out nicely.
Make sure you have already dug your hole, for transplanting, before you 'tap-out' your plant! Depth is good, but when you place the plant in, the top of its pot soil, should stand level with the ground soil.
Fill in around it. Patting soil down lightly.
DO NOT tread around the plant, firming the ground too early causes plant damage!
Same principles apply to shrubs.
With saplings/ trees the only difference, is if they are not in a pot. PLUS you have to dig deeper, and make sure the top soil is a good six inches above the pot soil the sapling came with. This helps encourage roots to spread and the trunk to thicken better!


Good Tips On Transplanting.
With any plant or seedlings into outside soils is, instead of watering afterwards, water before, you put them in.
Also, try to put in any extra soil, such as potting compost or similar, before you make a space for the transplanted item. If you don't it could break roots and damage any further growth.
When watering, make the extra soil soggy. Saturate it well. But do not water the main transplant. This will drown it, if you do.
Do not firm the soil around stems! Lightly press, making sure some lose soil is on top. Helping your plant to breathe through the soil, collect nutrients and moisture.
Also preventing types of stem/root rot.


Know Your Soil

KNOW YOUR SOIL!

First off, buying kits for Ph-testing of the soil. These are not always accurate, and are often affected by such environs as fertilizer, humidity, heat and cold.
JUST remember, soil no matter what type, can be converted to facilitate ANY plant, tree or shrub with the right conditioning.
Soil can be easily placed into four categories.
          1        Dry soil – easy drainage. This is soil such as sandy based, or thin top soil       and heavily graveled. Limestone and certain chalky areas. Making the Ph balance more alkali.
          2        Wet soil  - not easy drainage. Clay topsoil, thick topsoil that sports a          moss or similar. Flood zone areas, or prone to a lot of rain. Lower valley in particular.
          3        High Nutrient – plenty of good rich loam and top soil. Soil is darker than    most, and has a 'leafy' texture. Damp           but not sodden with water.
          4        Low Nutrient – this soil tends to be harder for even the weeds to populate.      It is often a lot more paler in color.  From an orange-red  – to even a           whitish-       gray.  Tends to accompany extremes of dry or wet. New housing often sits on soils   like this.


Another good way to check the variables in your soil is to identify what kind of plants (weeds,) are already in growth about your property. Along with the grass coloration. These are also great indicators to your soil's potential for use.
Not all soils need boosters of fertilizer, or more soil added.
But most need some form of stabilizing treatment.  Such as a simple soluble with water to kick start it. Or perhaps a good tilling.

Dry soil – May need some mixers. Best thing to stop it drying out quickly is, to add a  load of wood chips and mix it in when you till it, the second time.* Or an easy method, is to 'bank' it up. By raising it higher than the non-gardening section of the land. Then add your mixers.

Wet soil – You need to add a little sand, to aid in drainage. If you have a clay soil base, which is the most common for problems with drainage, then add wood chips along with your sand and some chalk. This works wonders. Also you may need some top soil too. This is due to it being flooded and nutrients washed away with some areas.

High Nutrient – Do not do a thing! Perfect soil! Congratulations! Just be careful! Do not add any unnecessary fertilizer to the soil. A good tip for the nutrients break up easily to feed your garden, is to add a tablespoon of Epsom salts per two gallons of water, and lightly, spray your garden, then till it.

Low Nutrient – Easy, get your fertilizer going! Such as cow, horse or chicken manure. Nutrients means nitrate levels. Compost, rotting leaves, all of this should be tilled in the first time, then tilled again to ensure equal distribution.


After your soil has been stabilized, then it's time to buy garden plants- Buy Trees, Shrubs & Plants at Garden Delights Nursery.